

For whatever reason you decide to sew lined curtains - make sure you purchase the appropriate lining fabric. Its a polycotton fabric and you can choose medium weight or heavy weight lining depending on your project. Ask your fabric shop for advice.
I have to say other than the living room - any parent of a baby/toddler will say that lined curtains in the nursery are imperative for your sanity if you have a little early riser on your hands !

To get started you will need to find a big space on the floor to lie out your fabric. Cut your lengths. (Measure from the top of the pole to the floor and add your seam allowances - I added 10 inches. 5 inches for the top and 5 inches to the bottom.) I could have probably added a bit more as the final curtains didnt quite touch the bottom. I always think curtains look best hanging all the way to the bottom. You will also need to measure out your lining. I like to ensure its approx 2 inches shorter on the width (sides) and 4 inches shorter lengthwise along the bottom. I found it worked well having a carpet to line up my fabric with. You will know what I mean when you start measuring out your pieces.


NOTE: WATCH FOR DIRECTIONAL FABRICS WHEN DETERMINING THE BOTTOM AND TOP)
1. Once you have your pieces of fabric lined out on the floor - start by measuring out the hem on the bottom of the curtain and folding up desired length. Pin in place and sew. I like to sew a blind hem on the bottom of my curtains so here is how you pin the fabric in place correctly.


2. Now time to sew using your blind hem foot. You can google this if you dont know how to do this. Here is what a blind hem foot looks like.


3. Once you have done a blind hem on all your panels you can start to do the bottom hem of the lining fabric.


I measured it 3 1/2 inches.
The ASSEMBLY
4. Now place your hemmed lining on the drape, RIGHT SIDES TOGETHER.
BUT only align one side of the edge.
I aligned the right side in this picture.
You will also leave 1-2 inches of drape fabric showing at the bottom.
BUT only align one side of the edge.
I aligned the right side in this picture.
You will also leave 1-2 inches of drape fabric showing at the bottom.
Here is the close up of the hems. I measured 1 1/2 inches of drapery fabric showing.

Right side pinned, and bottom measured at 1 1/2 inches.
Now sew the RIGHT side only...the length of the drape with a 1/2 inch seam allowance.
Now the skootching part...
Unpin the temporary bottom pins.
Now drag over the lining fabric to the left side. (this is where the 4 inch difference comes in for the widths)
Make sure you remeasure the bottom hems at 1 1/2 inches again.
Pin the length of the left side and sew with a 1/2 inch seam allowance, just like the right side.
Now you have a tube (open on the bottom and the top). Turn right side out.

Smooth out the fabric so the the drapery fabric is showing...even widths on each side.
Finishing the CORNERS
See that raw edge of the drapery fabric?

Fold it under diagonally.


Iron flat and/or pin in place. My fabric is a heavy woven linen so doesnt iron and stay in place that well.

Sew with a hidden stitch. Start at the top...


Now you have nice finished corners.
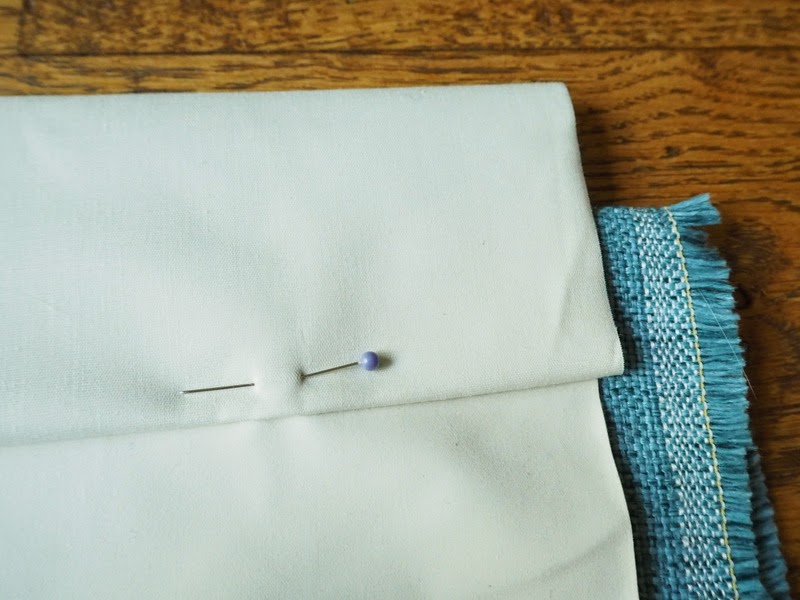
Finishing the TOP OF THE CURTAINS
Fold over the top seam 4 inches. This is a good time to check your measurements and adjust the top seam allowance against what you need your final curtains to measure.


Voila! Now you have finished lined curtains. Depending on your fabric, give them a good press/steam and then they are ready to hang.

- See more at: http://www.barefeetinthekitchen.com/2013/09/How-To-Create-A-Recipe-Index-On-Blogger.html#sthash.QoMgK9tU.dpuf


0 comments:
Post a Comment